


If you were wondering how to protect your Asterisk against network attacks, for example brute force, the fail2ban application is the answer. We strongly recommend its installation and configuration. This is basically a frontend to iptables or firewalld where the core lockdown takes place. When configuring fail2ban, we will decide what and how to block. The operation of the program is based on the analysis of logs and capturing, for example, unauthorized login attempts. In our article, we will focus on capturing attacks on the Asterisk PBX, but the applications of this tool are very wide: by protecting the web server, login pages for various services, and blocking exploits.
Table of Contents
1) fail2ban installation
Let’s run the command below to download and install fail2ban.
					yum -y install fail2ban # (CentOS/Rocky)
apt -y install fail2ban # (Debian/Ubuntu)
After several seconds, we already have our program installed. As we remember, it uses log analysis. So we need to add the security login level in our asterisk and load the appropriate module.
2) Adding login level: security
To do this, we edit two configuration files. If you are not loading Asterisk modules automatically (autoload = yes), we will load the res_security_log.so module first. To do this, edit the /etc/asterisk/modules.conf file
nano /etc/asterisk/modules.conf
In the [modules] section, add the entry:
load = res_security_log.so
Then, reload the module configuration with the following command: (from the Asterisk console, just > module reload)
asterisk -rx 'module reload'
Now we will add the security login level. To do this, we edit the file /etc/asterisk/logger.conf
nano /etc/asterisk/logger.conf
In the [logfiles] section, the following entry:
messages => notice,warning,error
tells us what types of events will be passed to the messages file in the log directory for Asterisk. We will find them in the place indicated by the astlogdir variable defined in the asterisk.conf file. There it is:
astlogdir => /var/log/asterisk
We want to add the security type to our log file, so we can add it to the message line:
messages => security, notice, warning, error
or add a separate file only for security (uncomment the existing or add a new line)
security => security
We can also decide to forward security logs directly to the Asterisk console. For this purpose, we will also modify the appropriate entry by adding the security keyword:
console => security, notice, warning, error
In the [general] section, we should also uncomment the default time format:
dateformat=%F %T ; ISO 8601 date format
In order for the introduced changes to take effect, we need to issue the command to reload the logger (from the asterisk console, just > logger reload)
asterisk -rx 'logger reload'
After reloading the logger in the asterisk console, it is worth taking a look at whether the settings we have introduced have entered into force and we can see security events in the expected time format.

3) Jail setup
No, we are not changing our business profile! 😅 Contrary to the gloomy subtitle, we will not get in the way of the prison service in our area. However, there is something to it, because after all, we will pursue potential criminals who will try to break into our system. Anyway, the developers of this software came up with the name jail for the configuration.
In the directory /etc/fail2ban/filter.d/ there is a list of ready-made filters created by the developers of the discussed solution. These filters catch suspicious behavior from the analyzed log file. There we will also find the asterisk.conf file, which we will use in our tutorial. Now let’s look at the crucial /etc/fail2ban/jail.conf file
nano /etc/fail2ban/jail.conf
It is not recommended to modify this file because it may be overwritten when updating the software. Therefore, we will create a new file for our needs, as suggested by the manufacturer: jail.local
nano /etc/fail2ban/jail.local
We will create our prison there for potential asterisk burglars. In addition, in the [DEFAULT] section, we will create an entry that will protect us from banning ourselves. The ignoreip parameter in the minimum configuration should contain your IP address or the entire secure subnet. You can enter several such addresses separated by a space or a comma. This is very important, because we could be cut off from the tested machine for quite a long time. It is determined by the bantime variable. For now, we will give it a small value for testing (default in seconds), maxentry tells how many times the entry will be blocked, and logpath points to our log file. I suggest pasting the following entry:
					[DEFAULT]
ignoreip = Your_IP_address or secure subnet; separated by a space or comma

[asterisk]
enabled = true
logpath  = /var/log/asterisk/security
action = iptables-allports[name=ASTERISK, protocol=all]
maxretry = 5
bantime = 60
The enabled parameter is set to true, which means that this protection is enabled when the program is started or reloaded. The software checks the filter configuration file whose name is the same as the section name + conf extension. It is located in the path /etc/fail2ban/filter.d/, in our case it is /etc/fail2ban/filter.d/asterisk.conf This file contains, among others, text patterns that are searched in the log file and other additional settings.
The parameter: action = iptables-allports[name=ASTERISK, protocol=all] indicates the way in which actions will be taken to prevent hacking. The software will perform the actions contained in the file identical to the name of the action + .conf extension – here iptables-allports. This file and others with actions are in the directory /etc/fail2ban/action.d/, in our case it is /etc/fail2ban/action.d/iptables-allports.conf
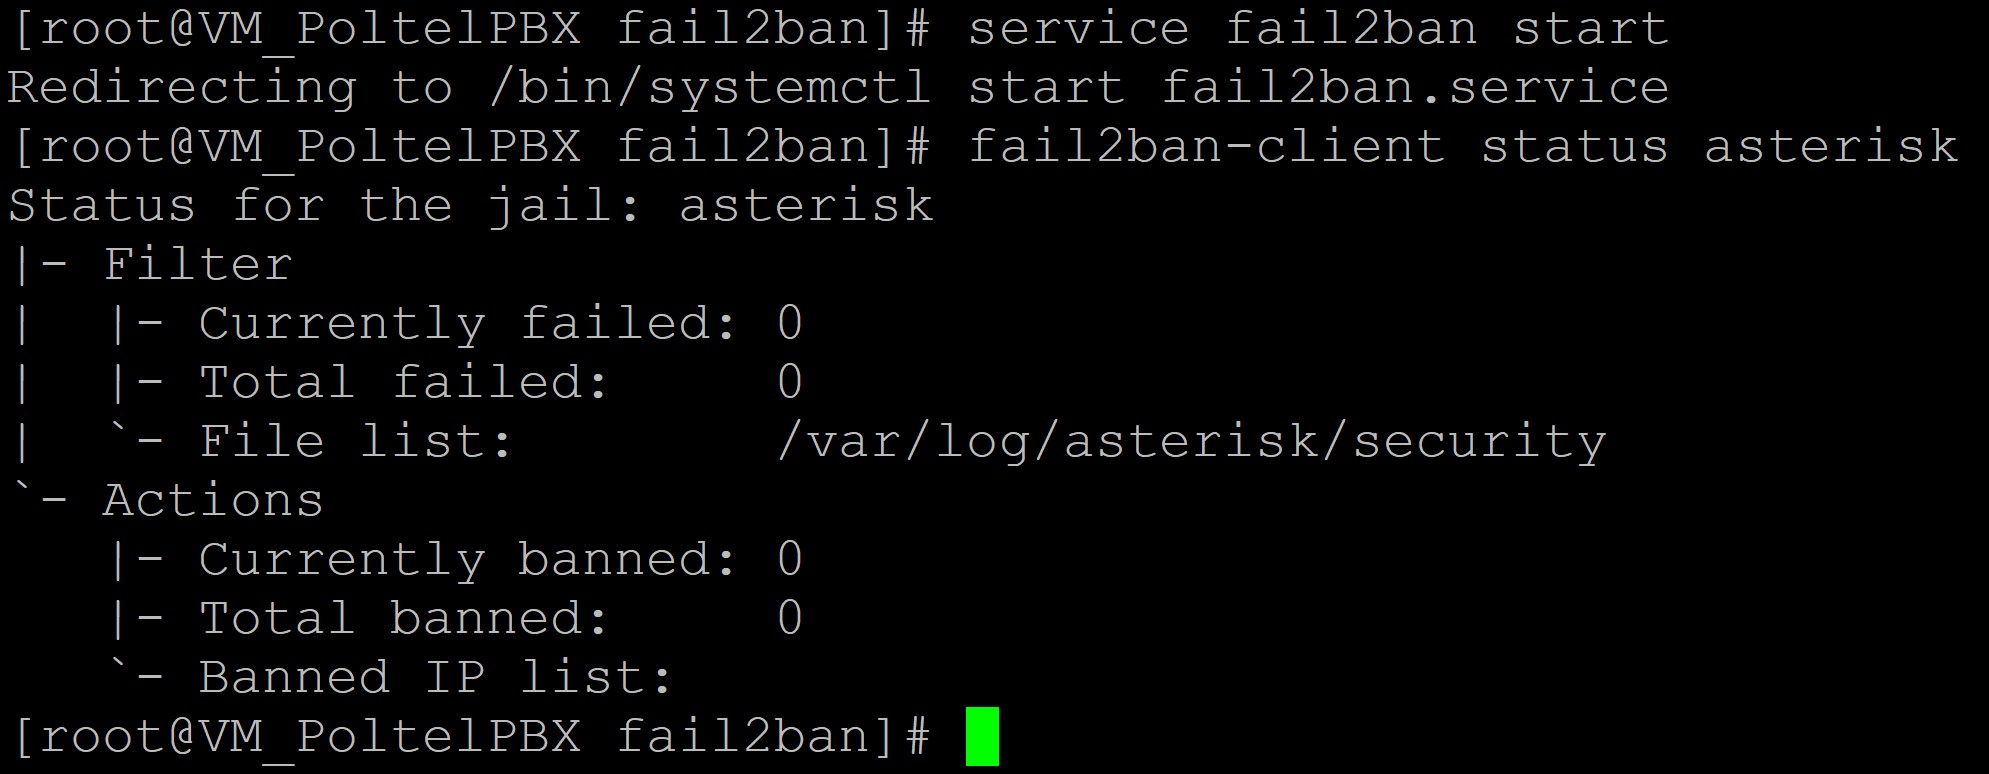
4) Startup and fail2ban status
It’s time to launch our application and check its status. Invoke the following commands:
					systemctl start fail2ban # (using system.d: CentOS 7+ / Ubuntu / Debian / Rocky)
service fail2ban start # (older versions Ubuntu / Debian)
chkconfig fail2ban on # (CentOS 6)
fail2ban-client status asterisk
We will see that the service is running and the jail is open and empty for now.
Let’s add our newly installed program to autostart to make sure that we will always be protected.
					systemctl enable fail2ban # (using systemd: CentOS 7+ / Ubuntu / Debian / Rocky)
chkconfig fail2ban on # (Centos 6 and older versions Rocky)
update-rc.d fail2ban defaults # (older versions Ubuntu i Debian)
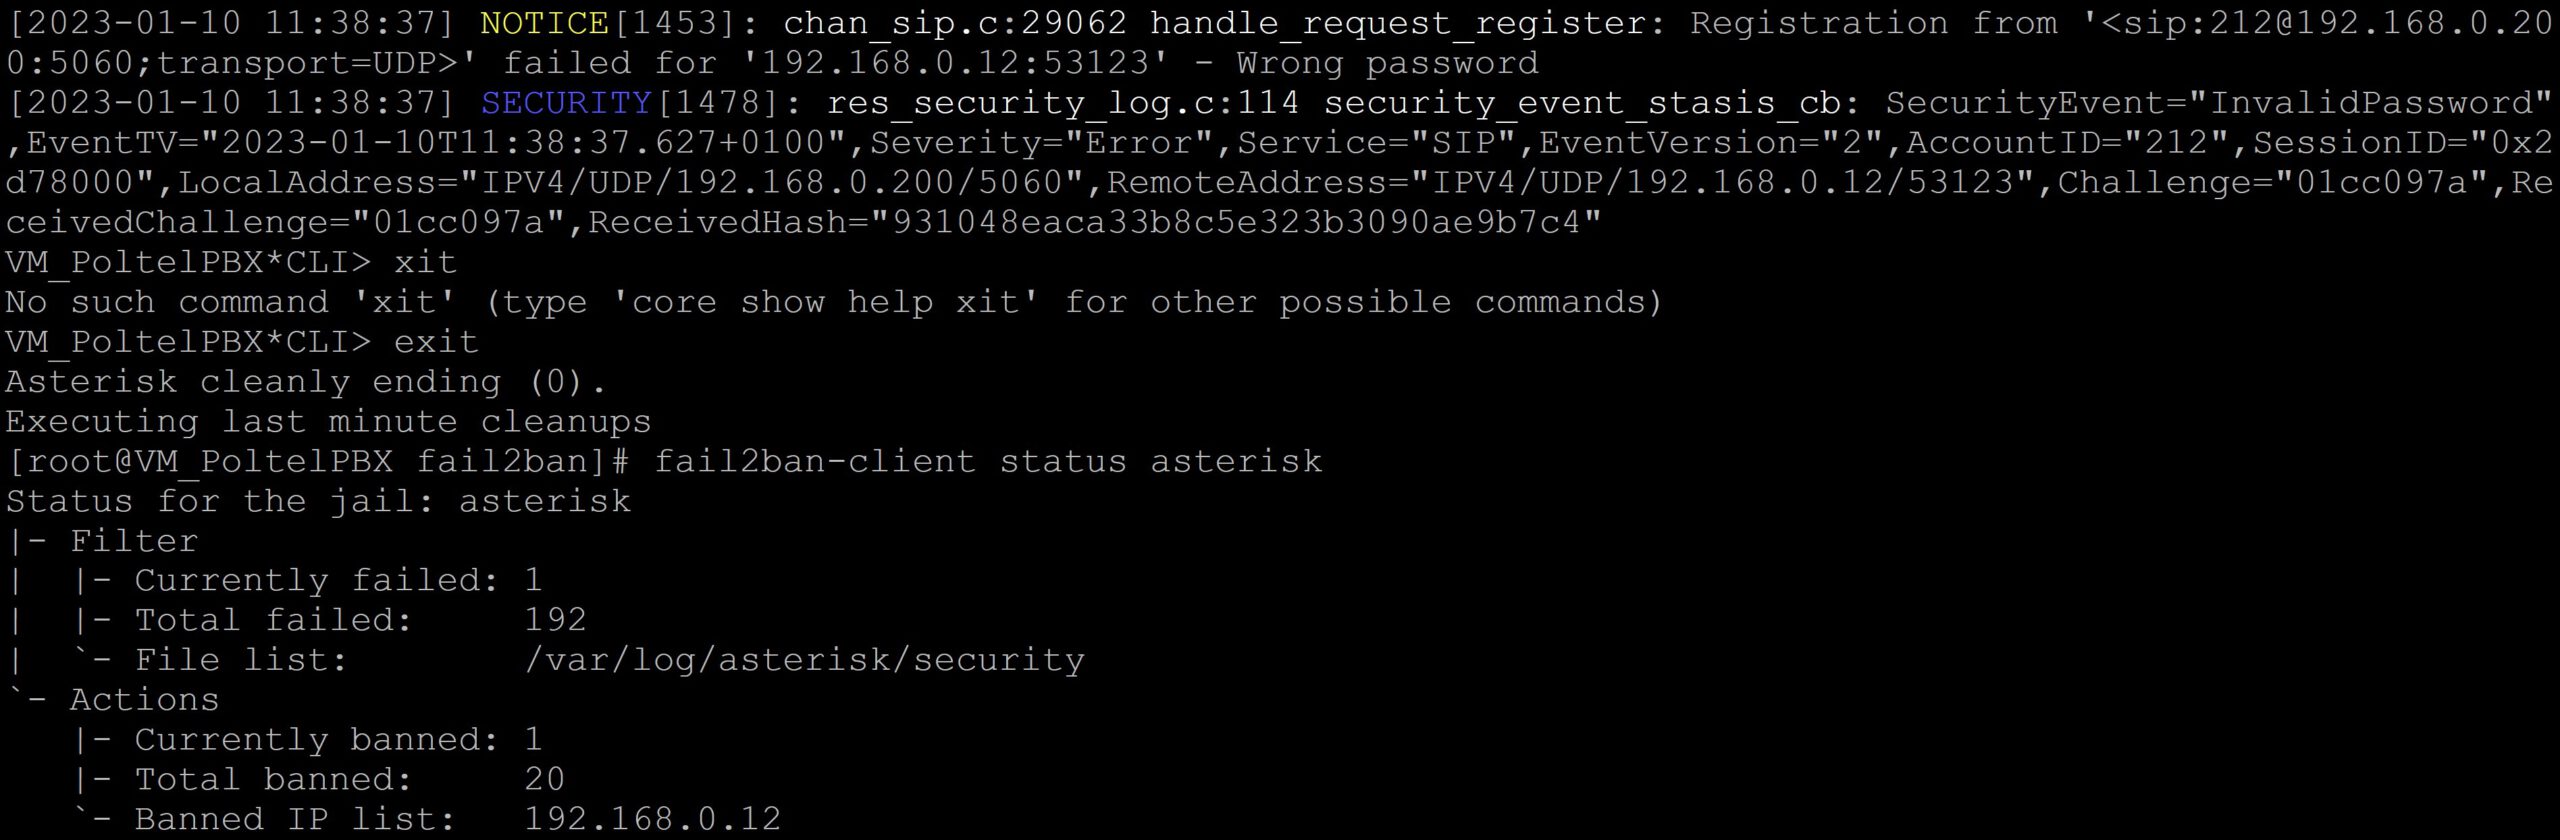
5) Repulse the attack
We will now simulate an attack on our PBX. I will try to log in to the phone several times with softphone by entering the wrong password. From the CLI console, you can see SECURITY entries with the InvalidPassword entry caught by the filter. The status will show us the number of hacking attempts, the number of blocked addresses and their list. Currently there is only one address because I kept hitting from the same address and the short ban time kept it auto-unlocking after 60 seconds.
If we are sure that the user’s actions from the blocked address are harmless, for example, caused by entering the wrong password several times, we can manually unblock this address before the block time expires.
fail2ban-client set asterisk unbanip 192.168.0.12
6) SSH security configuration
In a similar way, we can enable the protection of the SSH service.
There is a ready sshd.conf filter in the /etc/fail2ban/filter.d/ directory. Let’s look again at the jail.local file and add a second prison for potential burglars using ssh.
nano /etc/fail2ban/jail.local
					[sshd]
enabled = true
mode = normal
maxretry = 5
bantime = 60
Let’s see what our prison looks like now. Let’s restart our service and display its status.
					systemctl stop fail2ban # (using system.d: CentOS 7+ / Ubuntu / Debian / Rocky)
service fail2ban stop # (older versions Ubuntu / Debian)

systemctl start fail2ban # (using system.d: CentOS 7+ / Ubuntu / Debian / Rocky)
service fail2ban start # (older versions Ubuntu / Debian)

fail2ban-client status asterisk

We now have two ready and working prisons, so we can apply for government funding 😁
Fail2ban is an essential tool for blocking hackers, vulnerability-seeking scripts and malicious robots. The simplicity of operation ensures effective protection and allows you to easily create your own ban rules.

If you would like to monitor everything that is happening on your PBX, try our proprietary VOIPERO software.
Setup only takes a few minutes and the system is currently completely FREE.
Read what our VOIPERO system can do in terms of live monitoring and reporting of VoIP systems based on Asterisk.