


How to secure your PBX additionally and free of charge? You can create your own local certification authority, generate an SSL certificate and keys, and configure SIP and PJSIP channels accordingly. So get to work!
Table of Contents
1) Generating certificates
The easiest way to generate certificates is to use a ready-made script included in the software installer.
If you don’t have one, you can download the software from Asterisk’s servers. It can be any software version. In our case, we will download Asterisk 16 to the /usr/src/ directory, but of course it can be any other place on the server.
					cd /usr/src/
wget http://downloads.asterisk.org/pub/telephony/asterisk/asterisk-16-current.tar.gz
tar zxvf asterisk-16-current.tar.gz
rm -rf asterisk-16-current.tar.gz
cd asterisk-*/
TIP
# change user su asterisk
If you would like to run Asterisk as a different user, check this post.
Let’s also create a directory where we will store our keys. Below you will find the proposed directory, but of course you can choose any other.
mkdir /etc/asterisk/keys
Then, let’s generate our keys using a pre-made script. It can also define several variables:
- the “-C” option is used to define our host – DNS name or our IP address
- the “-O” option defines our organizational name
- The “-d” option is the output directory of the keys
contrib/scripts/ast_tls_cert -C pbx1.mycompany.local -O "My Company" -d /etc/asterisk/keys
We will be asked to set (and repeat) a password for the main ‘ca.key‘ key. This will create a local certificate authority. Then we will use the same password to create the ‘asterisk.key‘ and the file ‘asterisk.pem‘ which is the combination of the key and the certificate.
We will enter the password 4 times in total.

The good news is that the keys were automatically added with read-only permissions.
ls -l /etc/asterisk/keys/
You can also do this yourself with:
chmod 600 /etc/asterisk/keys/*.*
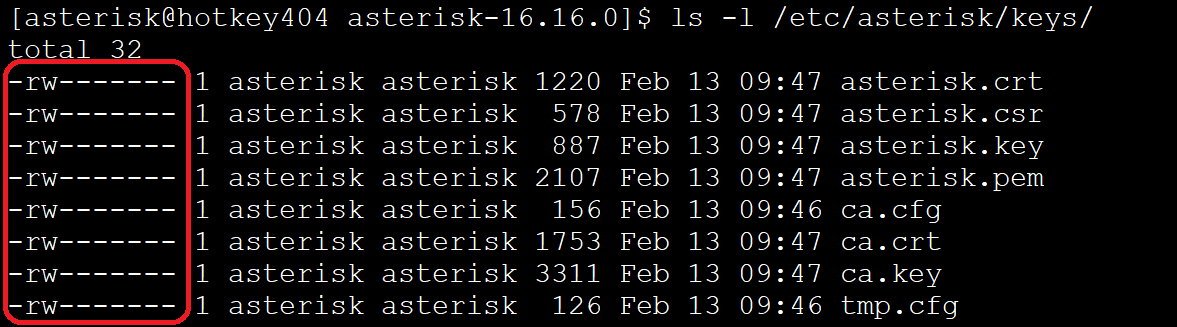
At this stage, however, it is worth making sure that the user on whom the Asteriska service is running has access to the key files. Otherwise, reloading the configuration may throw up errors similar to the ones below:
 Reloading SIP
== Using SIP CoS mark 4
[Feb 12 08:50:48] ERROR[1068]: tcptls.c:478 __ssl_setup: TLS/SSL error loading cert file. </etc/asterisk/keys/asterisk.pem>
[Feb 12 08:50:48] ERROR[1068]: tcptls.c:126 write_openssl_error_to_log: 140543266764288:error:0200100D:system library:fopen:Permission denied:bss_file.c:402:fopen('/etc/asterisk/keys/asterisk.pem','r')
140543266764288:error:20074002:BIO routines:FILE_CTRL:system lib:bss_file.c:404:
140543266764288:error:140DC002:SSL routines:SSL_CTX_use_certificate_chain_file:system lib:ssl_rsa.c:701:
In our example: if we didn’t create the files as the ‘asterisk‘ user, but as ‘root‘, then just change the owner with the command:
chown -R asterisk: /etc/asterisk/keys/
2) SIP channel configuration
We will carry out the entire configuration in the main file, i.e. sip.conf.
Only two additional lines of code and the fix in the third one are enough to start communication via TLS for local devices. Let’s start by opening our config file.
nano /etc/asterisk/sip.conf
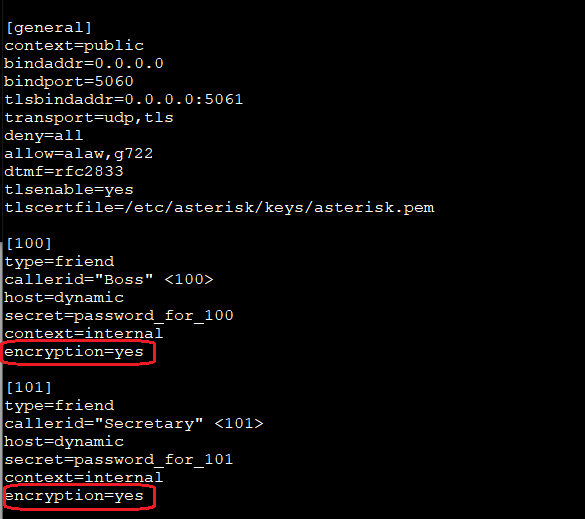
In the [general] section, it is enough to start TLS, add transport support and define the file with the certificate.
					tlsenable=yes
tlscertfile=/etc/asterisk/keys/asterisk.pem
transport=udp,tls
TIP
To add more transport options, just set the variable to e.g. transport=tls,udp,tcp (provided they are available).
If a transport method is unavailable, Asterisk will try to use the next one.
Instead of the [general] section, we can define these settings for individual endpoints.
Optionally, you can use additional variables related to TLS configuration for local SIP extensions. Some of them are:
- tlsbindaddr=0.0.0.0:5061 – the ability to change the IP address or listening port
- tlscipher=ALL – cipher selection (documentation: https://www.openssl.org/docs/manmaster/man1/openssl-ciphers.html)
- tlsclientmethod=tlsv1 – cipher method selection (available are tlsv1, sslv3, sslv2)
Other options, such as tlsdontverifyserver, apply to situations where our device acts as a TLS client, not a server.
But back to the topic …
Now it is enough to reload the configuration from the console level.
asterisk -rvvv
In console, execute:
sip reload

To check if the changes work as needed, execute ‘sip show settings‘ in the console or simply:
asterisk -rx 'sip show settings'

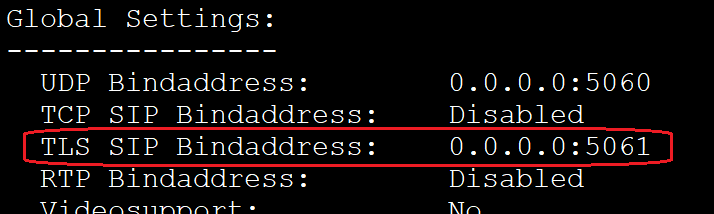
We also see that TLS listens on port 5061 by default.
3) PJSIP channel configuration
In this case, we will do the configuration in the pjsip.conf file. So let’s edit our file:
nano /etc/asterisk/pjsip.conf
If you are using both SIP and PJSIP, set bindaddr and/or tlsbindaddr appropriately so that there is no port conflict.
Next, let’s add the context that will be responsible for the TLS transport.
					[transport-tls]
type = transport
protocol = tls
bind = 0.0.0.0:5061
cert_file=/etc/asterisk/keys/asterisk.crt
priv_key_file=/etc/asterisk/keys/asterisk.key
Reloading the module (from the Asterisk console) will allow us to see a new method of transport.
					module reload res_pjsip.so
pjsip show transports
TIP
According to the documentation, there is no need to define transport for individual endpoint. The system will select it automatically.
You can also use additional variables, such as the method variable discussed earlier (tlsv1, sslv2, etc …).
4) The result of network capture (with .pcap examples)
What is the result of using TLS?
After registration ofour sip phone (in our case Yealink), the execution on the PBX ‘sip show peer XXX‘, where XXX will be our extension, will show that we use TLS registration.


Let’s try to intercept network traffic. The final result is presented below.
In the first case, we see a lot of information regarding the exchange of communication using plain UDP.
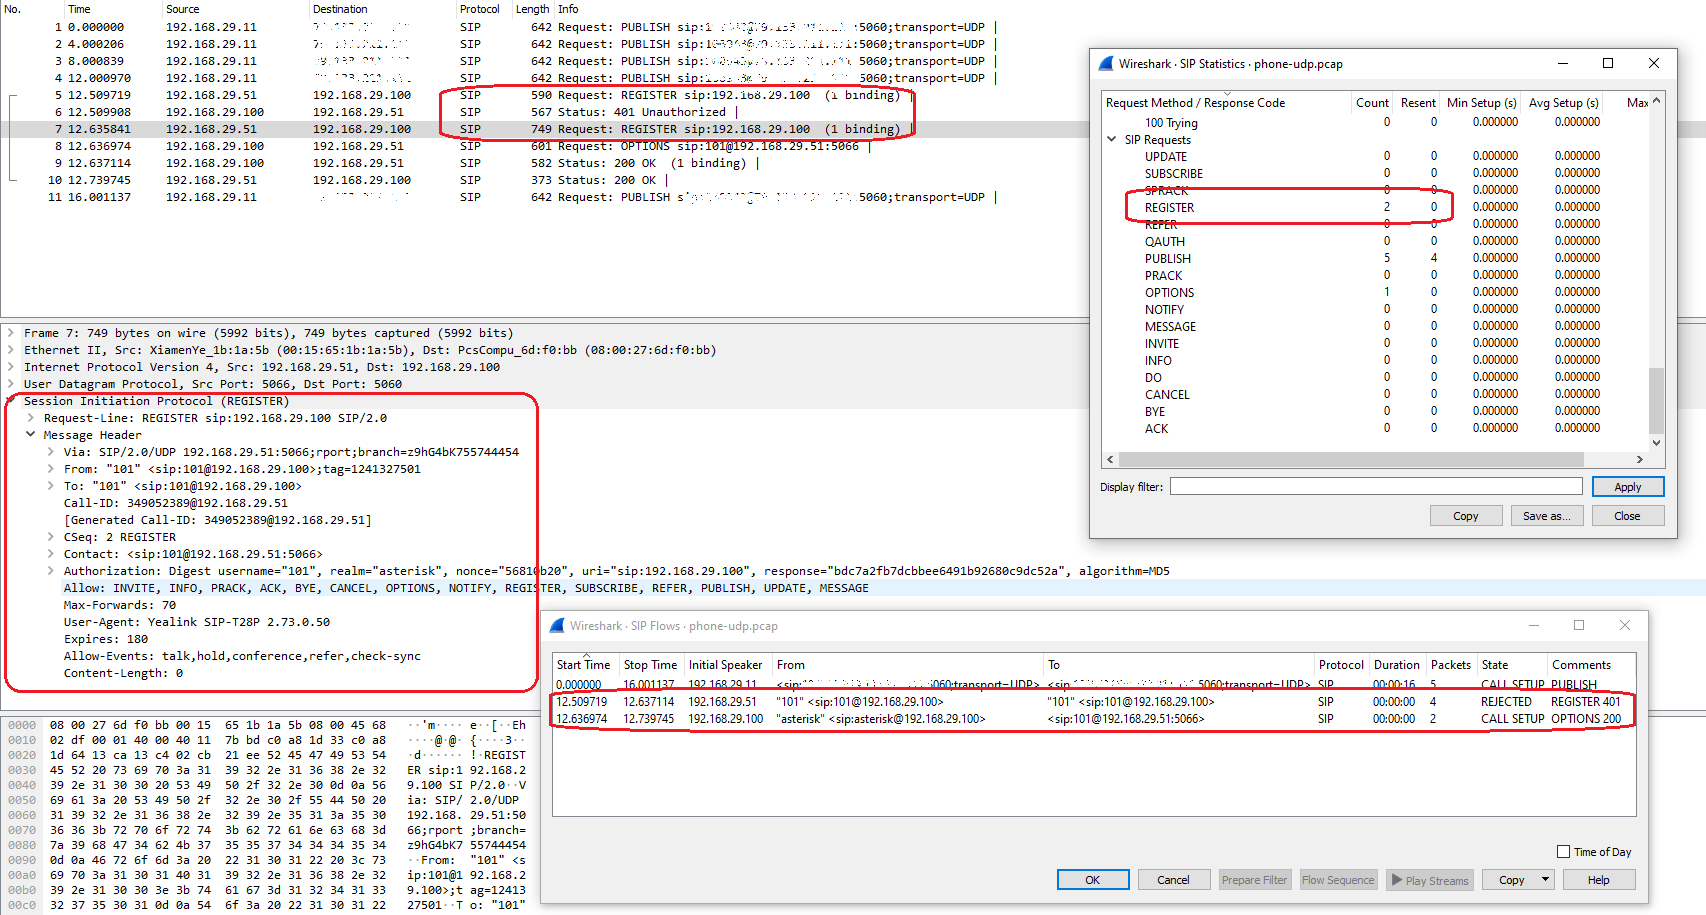
Switching to TLS means that you can see practically nothing.
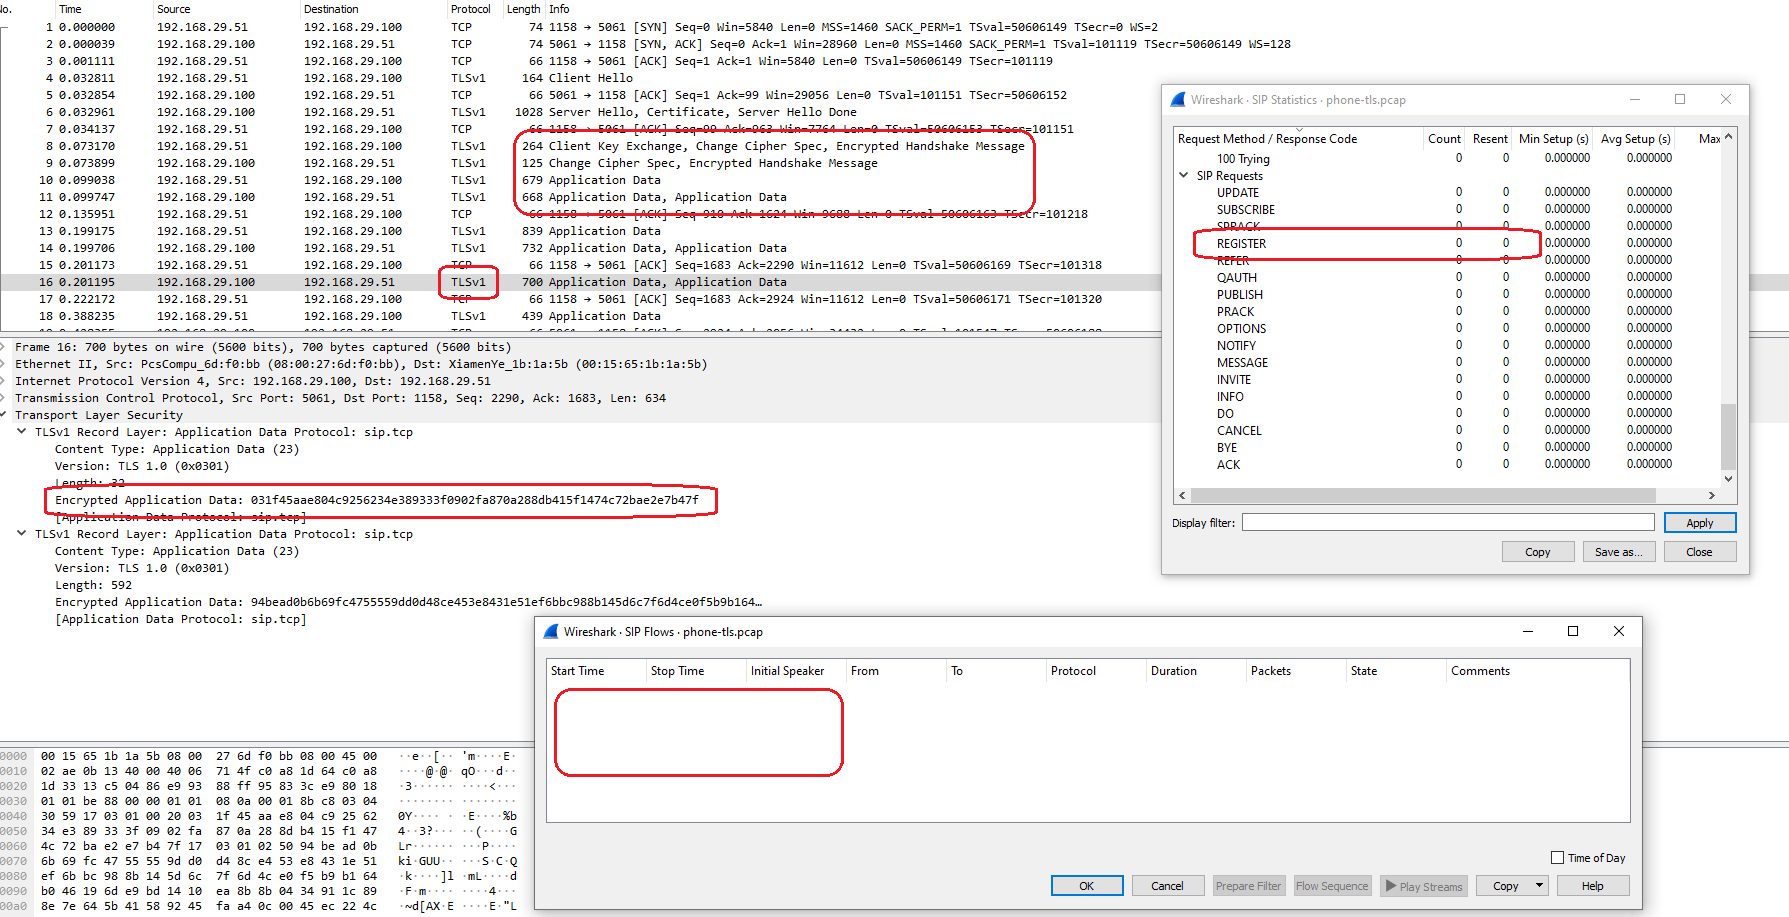
If you want to check how these files look like, here they are:
- asterisk-security-tls-registration-phone-udp-example.pcap
- asterisk-security-tls-registration-phone-tls-example.pcap
And that’s all. Was it worth spending these several minutes to add some security to your Asterisk? And all of that for free?
In my opinion … ‘yes’ !

If you would like to monitor everything that is happening on your PBX, try our proprietary VOIPERO software.
Setup takes only a few minutes and the system is currently completely FREE.
Get to know what our VOIPERO system can do in terms of live monitoring and reporting of VoIP systems based on Asterisk.