


- Hosted PBX
- IP PBX (Business Phone Systems)
- VoIP Gateway
- Voicemail server
- Conference Bridge
- Call center
- IVR server
If you prefer a different Linux distribution, you can also see our articles about installing Asterisk on Debian, Ubuntu, Rocky 9 and CentOS Stream 8. Click on one of these links to see how to install asterisk on other Linux systems
Table of Contents
Below you’ll find all necessary commands and files to install Asterisk 16 from source on Centos 7.
While the instructions below are for installing Asterisk on a CentOS 7 system, we can install it the same way on an older version: CentOS 6.
Instead of following all the instructions below, you can also use out installer file that installs the basic version of Asterisk. The installer works both on Centos 6 and 7 systems (32 and 64-bit versions).
1) Prerequisites
First of all make sure that you run all command as root user. Just run su command and enter root password.
Otherwise, add sudo before every command (eg. sudo yum -y install update)
su
It’s good to start with installing a simple text editor. Personally I use nano. If you want to adjust it to editting Asterisk check out this post.
Update the system and install required dependencies.
					yum -y update
yum -y install nano wget
2) SELinux
Before you start you should also disable SELinux (Security-Enhanced Linux – Linux kernel security module). Without doing so you’ll face issues later, eg. with recordings playback.
First let’s use sestatus command. It will show you current SELinux status:
sestatus

To disable SELinux edit file /etc/selinux/config and change policy from enforcing to disabled.
nano /etc/selinux/config
Alternatively to editing /etc/selinux/config you may just type in command:
sed -i s/SELINUX=enforcing/SELINUX=disabled/g /etc/selinux/config
3) Reboot
Unfortunately reboot is the only way to permanently disable SELinux so let’s do just that.
reboot
If you do not want to restart the computer now, but want to go into ‘permissive’ mode, enter setenforce 0. This will allow you to continue without having to restart.
setenforce 0
After reboot sestatus should show it’s disabled.

4) Configuring dependencies
First download Asterisk sources. /usr/src is a very convenient place to store all source files.
					cd /usr/src
wget http://downloads.asterisk.org/pub/telephony/asterisk/asterisk-16-current.tar.gz
tar zxvf asterisk-16-current.tar.gz
rm -rf asterisk-16-current.tar.gz
cd asterisk-*/
Now (compared to eg. Asterisk 11) you don’t have to name all required dependencies (eg. make gcc gcc-c++ lynx bison ncurses-devel). You do all that with pre-created script. To be able to download more resources (like opus codec or spandsp for faxing) add EPEL repository first.
					# optional epel-release
yum -y install epel-release

contrib/scripts/install_prereq install
Now you can choose some options with which you’ll configure your Asterisk. If you use 64bit system you should add --libdir=/usr/lib64 to configure command. To verify whether you’re using 32 or 64bit system use uname -m command.
Since chan_pjsip requires some additional libraries it’s good (but not necessary *) to add --with-jansson-bundled --with-pjproject-bundled to configure command.
* Beginning with Asterisk 15.0.0, it is enabled by default but can be disabled with the --without-pjproject-bundled option to ./configure.
# for 32bit
./configure --with-pjproject-bundled --with-jansson-bundled
# for 64bit
./configure --libdir=/usr/lib64 --with-pjproject-bundled --with-jansson-bundled
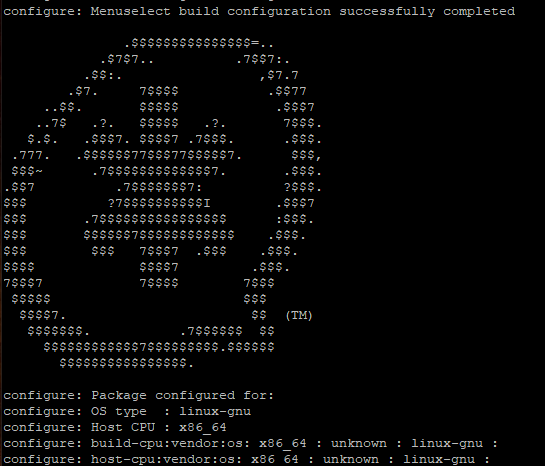
After it finishes you’ll see “all-is-done” screen with Asterisk logo.
5) make, make, make and … make
Then you could just make and this would compile your software. But it’s better to be able to select some additional options, functions, applications, codecs, etc…..
To do that use make menuselect option. It will show you a menu in which you may simply select what you need.
make menuselect
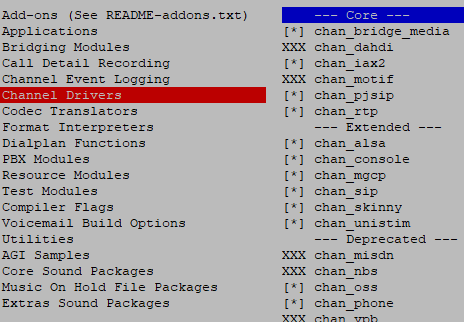
During the process you may check, switch, select and deselect all options eg. use ODBC instead FILE storage for Voicemail.
You’ll notice that you cannot select all modules. But it also shows which dependencies are required.
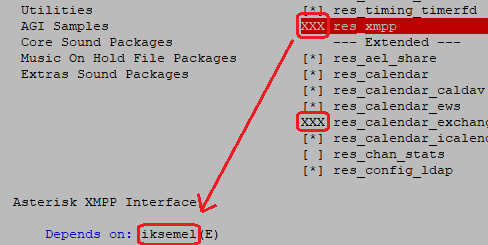
In this example if you download&install ikemel-devel rpm problem is solved. Of course you have to ./configure once again before menuselect.
Unfortunately there are so many modules it’s hard to explain all dependencies. For the sake of this tutorial we’ll stick to basic configuration. In upcoming posts we’ll be explaining addotional modules step-by-step.
If you want to deploy the same configuration in more server you may use one-line command menuselect/menuselect --enable-category MENUSELECT_ADDONS --disable MODULENAME --enable MODULENAME menuselect.makeopts. To list all possible options use menuselect/menuselect --list-options.
# example with ODBC Voicemail and ALAW soundpack
					make menuselect.makeopts
menuselect/menuselect --list-options
menuselect/menuselect --enable-category MENUSELECT_ADDONS --disable FILE_STORAGE --enable ODBC_STORAGE --disable CORE-SOUNDS-EN-GSM --enable CORE-SOUNDS-EN-ALAW --disable MOH-OPSOUND-WAV --enable MOH-OPSOUND-ALAW --enable EXTRA-SOUNDS-EN-ALAW menuselect.makeopts
Time to make everything and get ready to install. This and next process may take a few minutes.
make
The system tells you what to next. This will finally install Asterisk on your server.
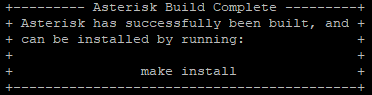
make install
If you selected format_mp3 just follow on-screen instructions.
contrib/scripts/get_mp3_source.sh
Now you have a few options:
- do nothing
Yeap … it does completely nothing. You have to create all files from scratch. make samples
Installs the sample configuration files (overwriting any existing config files).make progdocs
Installs just program documentation usefulonly for developers (requires doxygen:yum -y install doxygen)make basic-pbx(only Asterisk 13+)
The best option but unavailable in our Asterisk version. Same as “make samples” but with only 14 necessary files instead of more than 100.
I encourage you to do both 2nd and 4th option. Let’s start with make samples. This will create all files with nice documentation.
make samples
Then move them to new folder (eg. /etc/asterisk/samples/) and create basic config with make basic-pbx.
					mkdir /etc/asterisk/samples
mv /etc/asterisk/*.* /etc/asterisk/samples/
make basic-pbx
Although Asterisk is now ready (and surprisingly there is no informations about this on main screen) now you should do make config to create startup files and to make it easier to use basic commands.
make config
6) Starting Asterisk
Now can start your server and check it’s status.
					systemctl start asterisk
systemctl status asterisk
If you see Started LSB: Asterisk PBX. You’ve just installed Asterisk!
You may also enter /etc/asterisk directory and see all of the basic files and sample/ folder
					cd /etc/asterisk
ls

After that you may run asterisk -r and that’s where fun begins!
asterisk -r

Congrats!

If you would like to monitor everything that is happening on your PBX, try our proprietary VOIPERO software.
Setup only takes a few minutes and the system is currently completely FREE.
Read what our VOIPERO system can do in terms of live monitoring and reporting of VoIP systems based on Asterisk.