


If you were wondering how to register SIP end devices on your Asterisk PBX and how to connect to your VoIP service provider or to a second Asterisk server in a different location, this article is for you.
Here you will find a basic list of variables required for minimal configuration of SIP users/peers, and those that will enable connection to an external VoIP server.
Table of Contents
1) SIP section [general]
Before we start registering endpoint devices, let’s define the basic variables that will enable the registration of those devices. Below you will find a basic list with a brief explanation.
| Variable | Description |
|---|---|
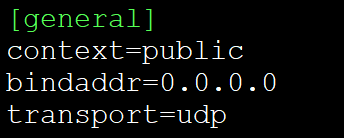
| context=public | Default context for incoming connections (instead of the default “default”) |
| bindaddr=0.0.0.0 | Asterisk listens on any IP address on UDP port 5060. You can specify a specific IP address and/or port by entering, for example, bindaddr=192.168.1.200:5070. You can also define the IP address and ports independently for UDP, TCP and TLS by specifying different values for “udpbindaddr”, “tcpbindaddr” and “tlsbindaddr”. |
| transport=udp | Set the default transports. The order determines the primary default transport. |
2) Local SIP extension
Below you will find a basic list of variables necessary to register a telephone, gateway, or other receiving endpoint device.
| Variable | Description |
|---|---|
| [100] | Unique extension number (or name) to which the call will be made (in this case it will be Dial(SIP/100)). |
| type=friend | Endpoint device type. For local devices used to pick up connections, this will usually be ‘friend’. |
| host=dynamic | IP address from which registration is possible. For a specific IP address, enter e.g. host=192.168.1.101. |
| secret=YourStrongPassword | Password for device registration. The more complicated the better. |
| context=internal | The device context, which is the place in the dialplan from which this device starts when making a call. |
| callerid=”My name” <100> | Information on how the device should present itself. It consists of two parts: “name” and “number”. Several devices can have the same callerid. |
3) Connection to an external VOIP server
Below you will find a basic list of variables that will enable you to connect to an external VOIP server. You can enable communication e.g. with your VOIP service provider or another Asterisk server in another location (for the purpose of eg. making free local calls between units).
Depending on the configuration, authorization can be achieved in several ways.
3.1) Authorization by IP address
Here, the matter is very simple, because for communication it is enough to indicate the IP address of the target device.
| Variable | Description |
|---|---|
| [CARRIER] | A unique username to connect to. You can also make a call to it by using Dial(SIP/number@name) e.g. Dial(SIP/123456789@CARRIER). |
| type=peer | Endpoint device type. For external servers this will usually be ‘peer’. |
| host=1.2.3.4 | The IP address to which the connection is established. |
| port=5060 | Port used for communication with the device. |
3.2) Authorization with username and password
In this case, two changes to the sip.conf file are necessary.
First, in the [general] section, add the registration string. The full entry seems quite complicated:
register => [peer?][transport://]user[@domain][:secret[:authuser]]@host[:port][/extension][~expiry]
The easiest way would be the following structure: username:password@host, e.g .:
register => username:password@1.2.3.4
Next, add the device according to the table below.
| Variable | Description |
|---|---|
| [CARRIER] | A unique username to connect to. You can also make a call to it by using Dial(SIP/number@name) e.g. Dial(SIP/123456789@CARRIER). |
| type=peer | Endpoint device type. For external servers this will usually be ‘peer’. |
| host=1.2.3.4 | The IP address to which the connection is established. |
| fromdomain=1.2.3.4 | like above |
| defaultuser=username | Username used for authorization when making connections. |
| fromuser=username | like above |
| secret=RemotePassword | Password for the second device (given by e.g. carrier) used for authorization when making calls. |
All of that, in the file (/etc/asterisk/sip.conf by default) will look like this:
[general]
register => CarrierUSERNAME:CarrierSECRET@1.2.3.4
context=public
bindaddr=0.0.0.0
transport=udp

[100]
type=friend
callerid="My name" <100>
host=dynamic
secret=YourSECRET
context=internal

[CARRIER_IP_AUTH]
type=peer
host=1.2.3.4
port=5060

[CARRIER_USER_AUTH]
type=peer
host=1.2.3.4
fromdomain=1.2.3.4
defaultuser=CarrierUSERNAME
fromuser=CarrierUSERNAME
secret=CarrierSECRET
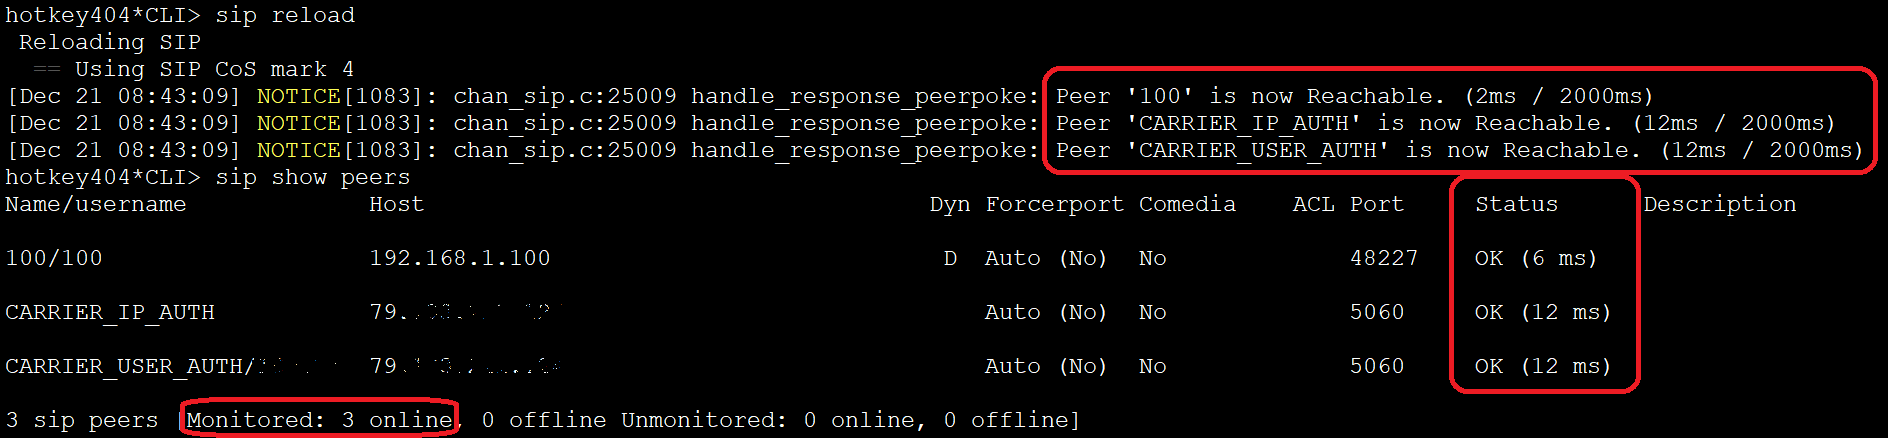
If we enter the actual data in the file and reload the module, in Asterisk (asterisk -r command) we can execute commands that will display our configuration.
					sip reload        # configuration reload
sip show peers    # list of peers
sip show registry # list of external registrations


If you want to check if the added extensions are available, you can add qualify to each ‘peer’, ‘user’ or ‘friend’ or add this variable globally in the [general] section.
For example, adding qualify = yes to the [general] section in the sip.conf file will display information about all connections to devices.
qualify = yes

If you would like to get knowledge about everything that is happening on your PBX, try our proprietary VOIPERO software.
The system arleady has launched and now is completely FREE. Setup takes only a few minutes.
Get to know what VOIPERO system is able to do in terms of reporting & live monitoring of VoIP systems created on Asterisk.