


If you want to be sure that there are no gaps in the company network through which documents will leak and that you spend your IT budget in an optimal way, you need a modern data protection solution: Safetica!
This article will explain how to prepare for the installation and how to install the main application engine. We will also help you install and configure the management console and the Web Safetica module.
This DLP software package allows you to control and classify information from all the activities of an employee in your company using the company computer. It monitors and collects information on the server, collects information from computers that are currently not connected to the corporate network. It gives you an instant view of the work in the workspace in real time, which means that you have access to reports at all times, even from your smartphone, giving you a full picture of potential threats and decrease in employee productivity. You can control and have a sense of full security regardless of whether employees are at work stationary or remotely.
Table of Contents
1) Preparations for installation
The Safetica software installer should be downloaded from the following address: (slightly over 1GB of data)
https://downloads.safetica.com/partner/safetica_setup.exe
If you are downloading an older version of the installer, please clear your browser cache. Information about the latest updates can be found on the manufacturer’s website.
https://www.safetica.com/blog/topics/product-updates
Recommended requirements for the server: Operating system: Windows Server, 4 Processors, 4GB Ram and 100GB of disk space, static IP address.
Run the installer and select the installation language (English in our case). The next installer window will allow you to choose between automatic and manual installation.
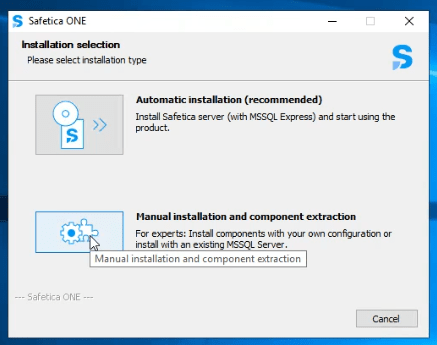
You can choose automatic installation, which will install everything, or manual installation, where you can install components as you see fit.
The automatic installation will install the following components:
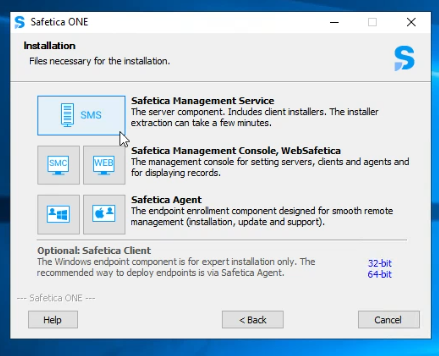
– Safetica Management Service – this is the main Safetica module.
– Safetica Management Console – a Windows application that is used to administer the system.
– WebSafetica – a tool that allows you to view data and basic configuration from a web browser without the need to install. It will be accessible from any device on the network
In this blog, we will choose the manual route – click Manual installation. In the next window, you will be able to review and save the necessary documentation.
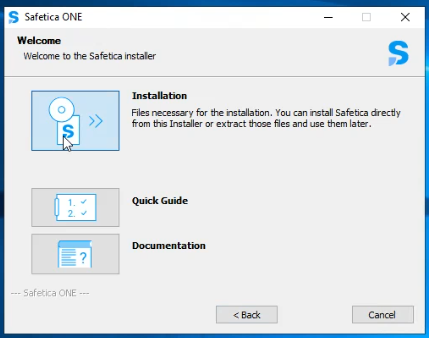
By clicking Quick Guide – you will receive an 11-page introduction to the system.
By clicking Documentation you will get complete installation and configuration documentation:
– Installation Manual – 25-page documentation that contains more details, such as the database or start-up configuration and deployment.
– Complete Manual – complete 104-page documentation regarding the installation and configuration of all individual system functionalities.
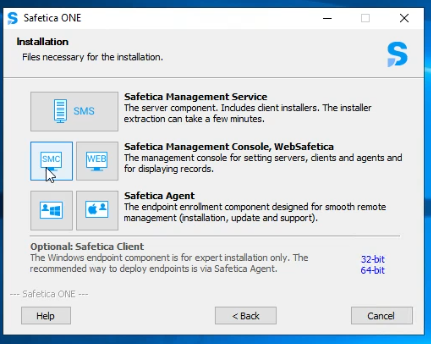
Click Installation to unpack or run Safetica component installers.
2) Installation of the main application engine
Click on the SMS – Safetica Management Service icon and then select Run Installer. Select the installation path and folder in the Start Menu. In the next window, we will select the database.
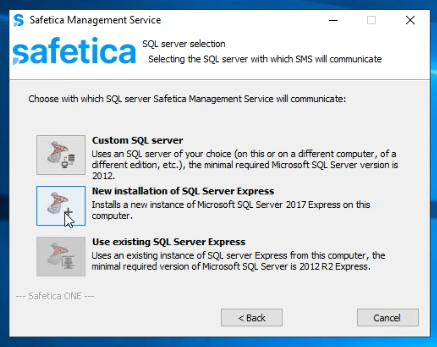
If you have your own custom SQL server, select Custom SQL server.
If the “Use existing SQL Server Express” option is greyed out, it means that the system has not detected any SQL server on the computer.
If you do not have a ready-made SQL server, you must install a new one by pressing: New Installation of SQL Server Express. You will then be taken to the installer of a new instance of Microsoft SQL Server 2017 Express.
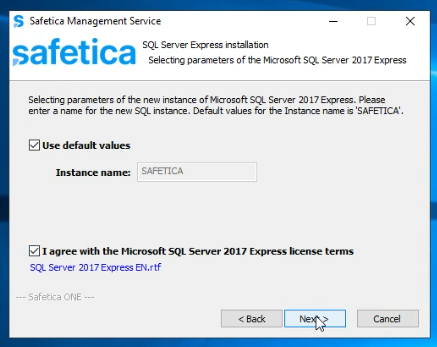
Choose default values. You must agree to the license to continue. The next windows will guide you painlessly through the installation process and you will reach the window with the database login details.
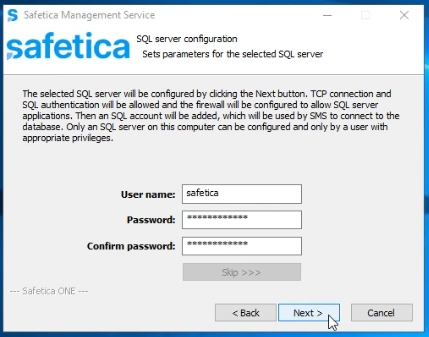
Confirm server details. The default password is S@fetic@2004 – it is only needed at the beginning, later you can enter your own password.
Next, you need to enter the data required to connect to the SQL server.
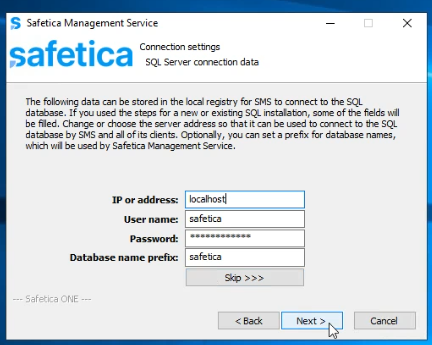
Depending on whether it is a local or external server, you need to adjust the data.
If the server is local: you can enter localhost
If the server is external: enter its IP, e.g. 192.168.0.50
In the next window, visible below, check the boxes according to your needs. However, we recommend the “Enable automatic definition updates” option. Then all definitions, categories etc will be updated automatically.
The second function is optional. If we see the need to send anonymous statistics about potential problems, we select “Send statistics automatically”.
By clicking the last Install button, we will finish the installation and return to the selection of installation components. Thus, the main engine of the safetica system is ready for operation.

3) Installation of the management console
In the main installer window, select SMC – Safetica Management Console
Click Run Installer, select the installation path, folder in the Start Menu and then decide on the application settings in the window below.

We don’t need the “Run program help” option, so we may or may not uncheck it. By clicking install, we finalize the installation of the Safetica management console.

4) Configuration of the management console
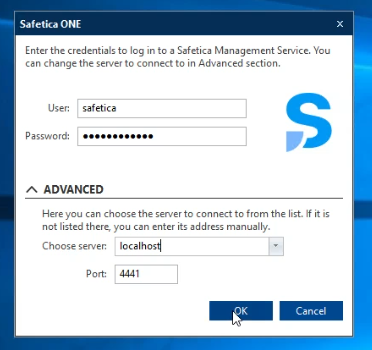
In the previous step, when finalizing the installation of the console, we forced it to start immediately. So now we can enter the login details in the window that appeared. The console can also be launched from the shortcut to the application that appeared on the desktop. While on the server, enter the server address: localhost and leave the default port 4441. If you installed the console on another computer, enter its IP address or a name recognizable on the network as the server address. The user is safetica and the password used only once at the first login is S@fetic@2004
Before proceeding with the configuration, make sure that the data you provide is correct, because while most of the settings can be modified after configuration, we are not able to go back to the previous section during configuration.
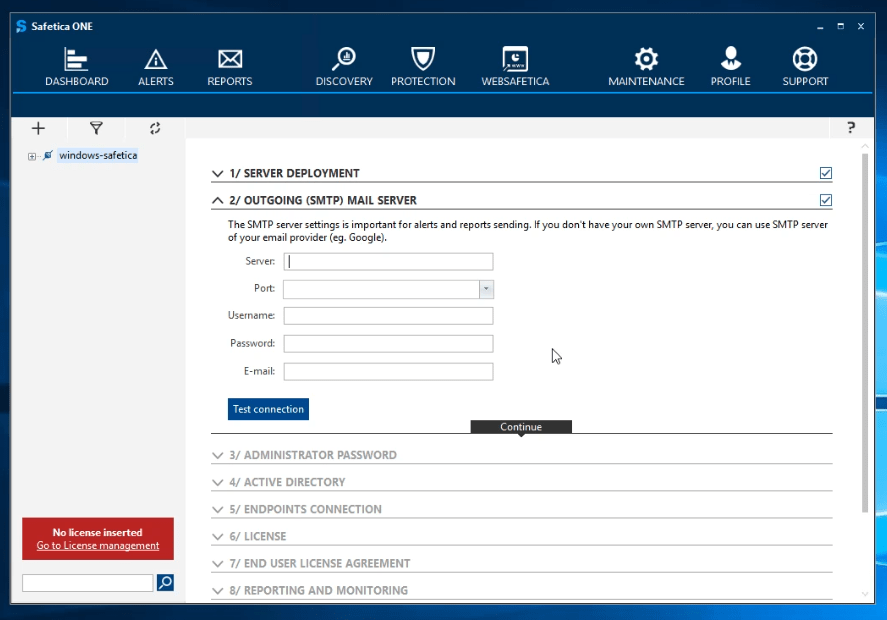
In the next step, configure the SMTP server.
If we have our own server, we can add our own account here, which will be used to send system notifications, alerts, etc … Perhaps a good solution will be to set up an additional account on our hosting, which will be used for this purpose.
If we do not have our own SMTP server, Safetica will automatically use an individual account in the Amazon AWS system, which we get for free at the time of purchasing the license.
With the Test Connection button, we check the correctness of the entered data. We need a well-configured e-mail account. Otherwise, our notifications will go to spam.
In the next section, we enter your own Safetica password, which will replace the previously used default password when logging into Safetica.
If we plan to use Active Directory, we can now connect our domain controller in the next section by pressing the “Change” button.
If you don’t know how to do it, we will describe the details in a future post. Otherwise, the section can be skipped

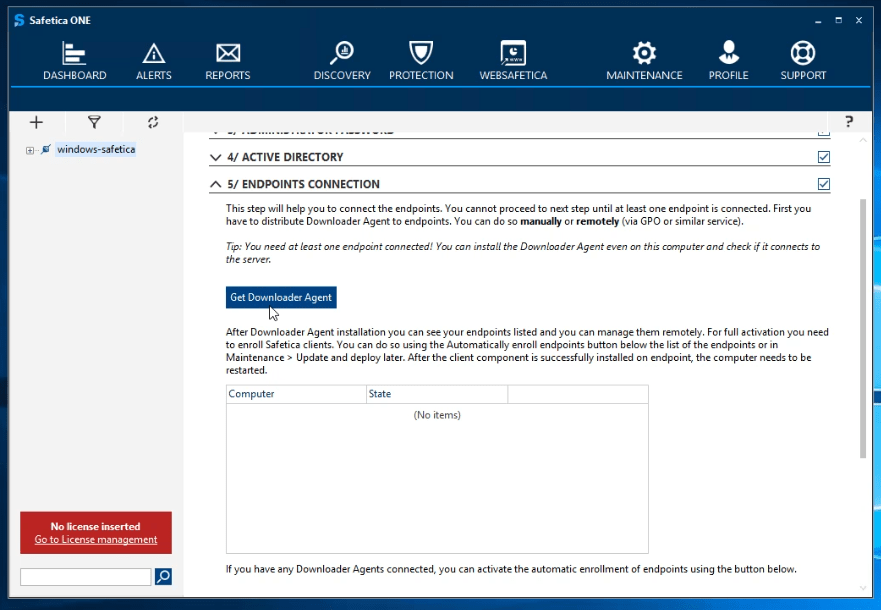
In the next Endpoint Connections section, we are most interested in the “Get Downloader Agent” button.
Let’s press it to download the file that we will have to run on the stations we plan to manage.
Then you must enter the license key, otherwise we will not be able to install the program. If you do not have a license, please contact us.
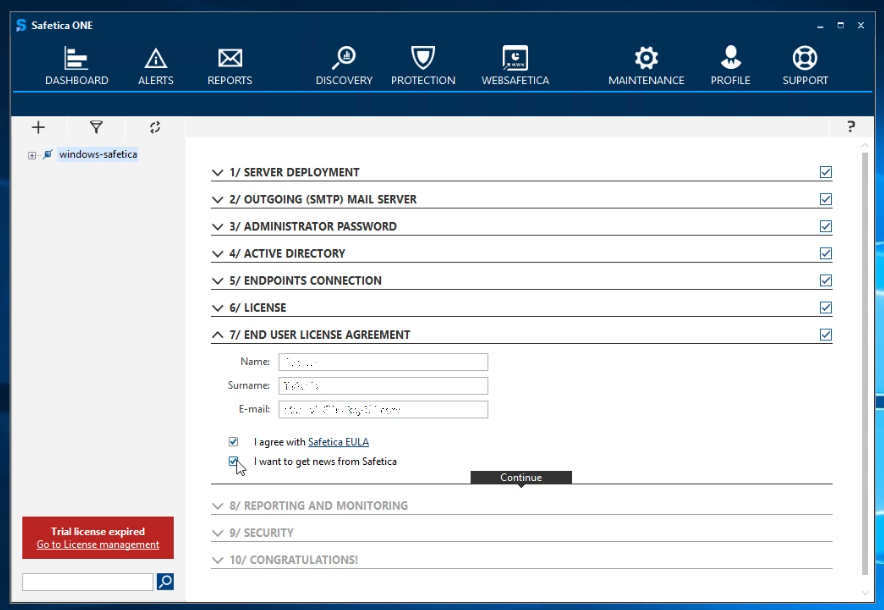
The next step will be to accept the end-user license agreement – the so-called EULA (End User License Agreement). It differs from a large part of the installation in that you have to enter your details: name, surname and e-mail.
From the two visible squares, accept the first “I agree with Safetica EULA”.
If you want to read the license agreement in more detail, you can press the blue text that serves as a link.
Optionally, you can also select a second square. This will cause you to receive information about news related to Safetica to the e-mail address provided.
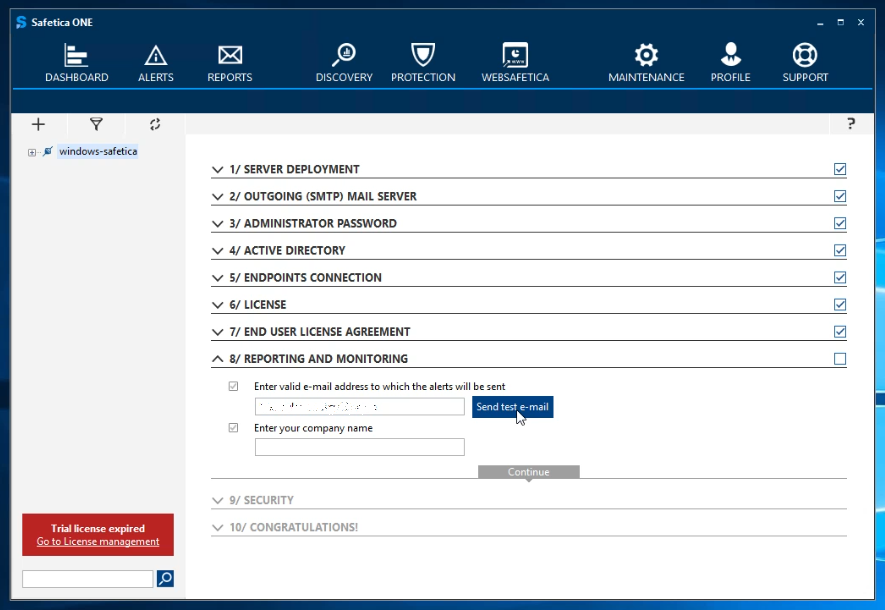
In the eighth step, enter the e-mail address to which Safetica should send notifications.
To make sure that everything is working properly, after entering the e-mail address, it is worth pressing the “Send e-mail test” button. You should get an email to the provided test email address.
In the second field, enter the name of the company that will use the software you are installing.
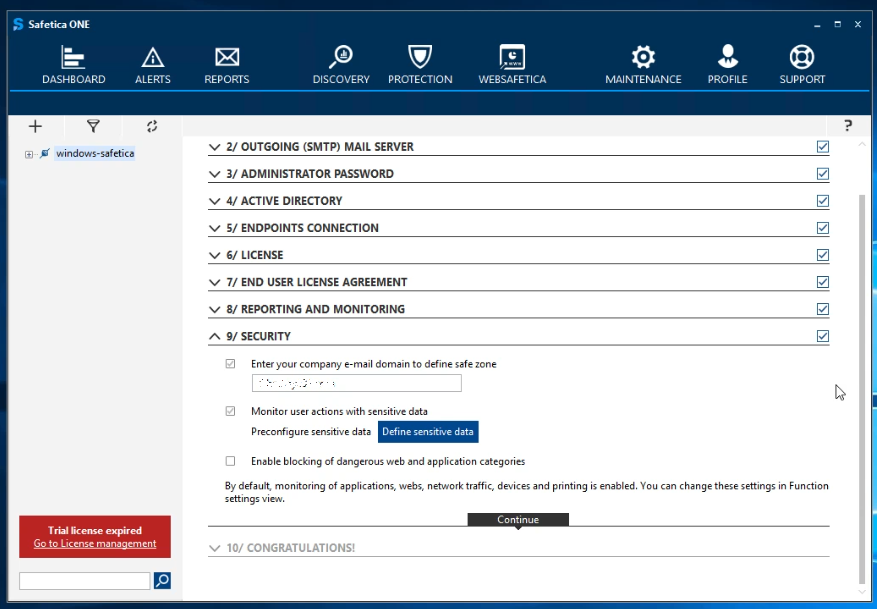
The next section contains security features that you can activate right away.
In the first field, enter your company email domain. It will be considered safe by Safetica.
The second field will enable the function of monitoring actions on sensitive data. If you plan to enable it, press the “Define sensitive data” button to specify what data is considered sensitive for monitoring purposes.
The third field activates the blocking of dangerous categories of sites and applications.
If we are not sure what functions we plan to use, we can change them later in the function settings.
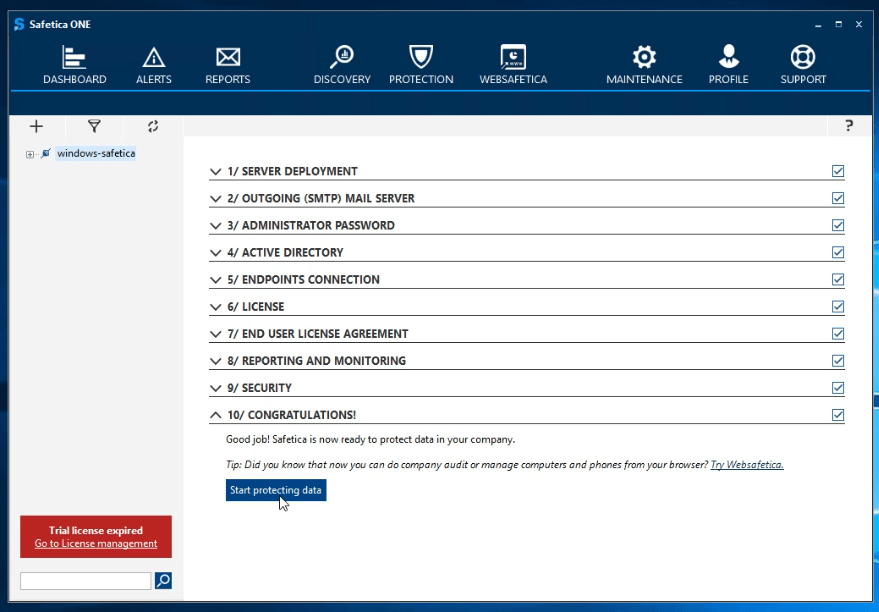
Congratulations! We just finished the initial setup. Press “Start protecting data” to start data protection.
5) Installing the WebSafetica module
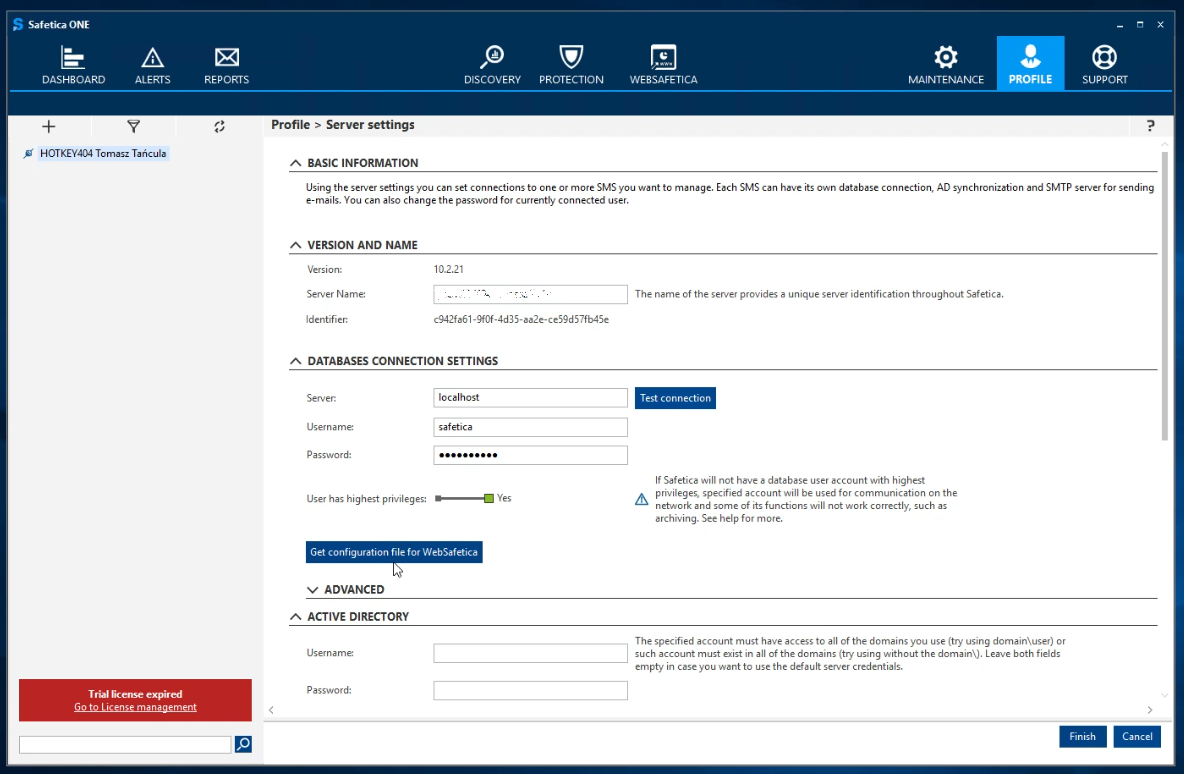
To run WebSafetica, we need its configuration file. We will find it by clicking the “Profile” icon in the console.
In the list of available “Connections”, select the system on which you want to run WebSafetic. In our case, we only have one, so we click “Settings”.
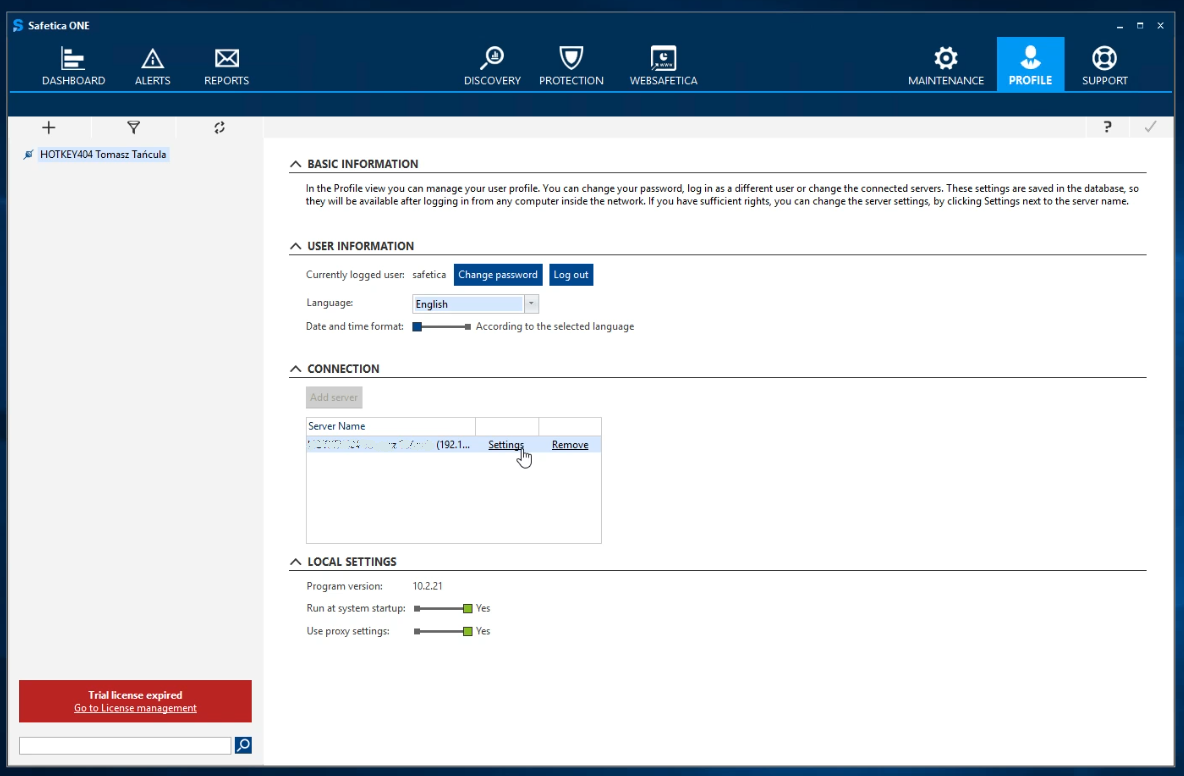
In the Database Connection Settings item, we have the “Get configuration file for WebSafetica” button. Clicking on it will download us a configuration file that we will use to install the module.
Now go back to the main installer and select Safetica Web Console installation by clicking the Web button. In the first step, press “Browse…” and select the recently downloaded configuration file.
Its default name is “WebSafetica.Web.SetParameters”. Now wait until the installer installs the web server that will enable us to use the WebSafetica service.
The installed server uses the SSL protocol, as a result of which it will listen on port 443 by default. If it turns out that there is already a server on a occupied port, Safetica will create a virtual server on another port that is free. Thanks to this, you don’t have to worry about collisions with previously installed servers.

When the installation is complete, the WebSafetica website will automatically open in your default browser where you can log in.
Later you can get to this page by pressing WebSafetica in the Safetica console, or by typing “https:///WebSafetica” in your browser.
You will probably still need to click on Advanced and confirm the security exception.

You can now use WebSafetica.

Well done, you have just installed your DLP system!